I decided my Lazy Susan Craft Buckets needed a little something extra. All I did was hot glue ribbon around the lazy Susan as well as the center bottle that holds pencils. Since my craft buckets are not attached to the lazy Susan I wanted the center bottle to look nice when the buckets are removed.
I used adhesive Velcro to stick the bottle to the lazy Susan.
For any of you looking for a wonderful and fun way to teach your little ones Bible stories, The Rhyme Bible is great! I came across this years ago when I was a nanny as well a a new believer. This adorable Bible in rhyme not only captivated and taught the little ones I was caring for, I myself learned a great deal.
I have since shared it with my own children as well as putting it to use in our Sunday school. Every kid loves rhymes... every kid I have shared this with loves it!
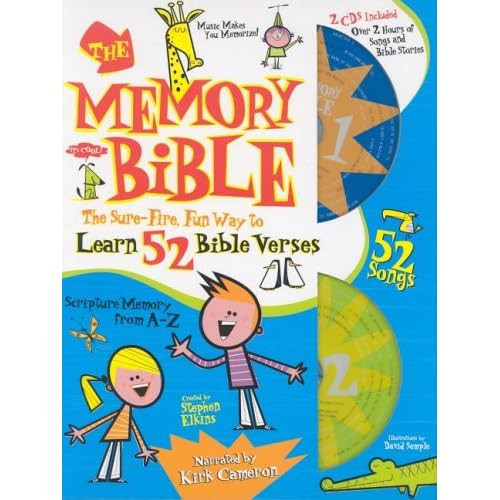
Another fabulous tool we use to memorize scripture is The Memory Bible by Stephen Elkins and narrated by Kirk Cameron. The Bible tells us to hide God's word in our hearts that we might not sin against Him. This Fun way of hiding God's word in the hearts of your children will have them eternally blessed.
A fun way we use this book is to read the verse, read the story and then take turns reciting the verse we just learned. I have the child say the verse in a normal voice, then we say it LOUD and then in a whisper. The kids love getting to shout out the verse! No child is too small to participate. I have begun this before my child could even speak clearly. They loved just making noise and all of us cheering at their attempt. Make a joyful noise unto the Lord! Click here to take a look inside the book.
Sunset.com Photo by Megan Thompson; courtesy of MyHomeIdeas.com
I am on the search for creative ideas for a twin headboard. May I also add inexpensive ideas for a twin headboard.
I am still in process of putting together my daughter and baby boy's room. One thing I am lacking is a bed frame or headboard for my daughter's bed. I thought it would be fun to be creative with coming up with a headboard for her instead of buying a whole bed frame. Later on in years when the two no longer are roomies, I may want this bedroom to have a full size bed and not spend the money on a temporary need for a twin bed now. My original thought has been to make an upholstered headboard, but we will see if my search yields any other creative solutions.
These photos are some of the things I have come across.
Sunset.com Photo by Deborah Whitlaw Llewellyn; courtesy of MyHomeIdeas.com
I love the rustic boards used as a headboard and what they did with the wall space. Also the frame bed, simply made from molding purchased at the hardware store and painted. I am thinking the middle of the frame can be either paint or fabric.
Some other ideas I came across were using shutters, or picket fence. Maybe even using shelves or cork board. There are a lot of really great ideas out there. Now I just have to decide what direction I want to go.
Here is a link to another really great sight for ideas. curbly.com Pin It Now!
Here is what became of my painted baskets. One of them will hold diapers and such for baby. Just a small peak into my still in progress Horse Theme boy/ girl bedroom.You can check out previous posts here Boy/ Girl Bedroom.
He Is Risen! Though the letters have been loved off, at one point this cross did read those marvelous words of truth!
Here is a fun Easter craft you could do with your kids or if you teach Sunday school, the kids in your class. I came up with this last Easter and had my kids and Sunday school kids do this and they really enjoyed it. This does not have to be limited to just Easter. Change the colors and the choice of words and you have a great craft for anytime.
The supplies you will need:
Sparkle foam "paper" found at any craft store. I found mine at Hobby Lobby.
Hole Punch
Ribbon (I used wrapping ribbon)
A Cross Template to cut out the Cross shape. You could draw it or download something from the Internet.
Different Colors of Tissue Paper
Contact Paper
Foam Letters
Ribbon to hang the Cross in a window How To:
Fold your sparkle foam paper in half. Place your Cross template in the center and trace around it. Cut out the Cross.
Punch holes around the edges. Punch two holes at the top to hang the cross in a window. Cut tissue paper into square pieces.
To make the stained glass center you will need to fold a piece of contact paper in half to fit the inside of the sparkle foam. Then cut the contact paper to fit.
Peel away half of the contact paper. Have the kids lay the different color tissue paper on the sticky side of the contact paper just over the cross shape. You need the edges free so the contact paper can stick to its self. Peel the rest of the contatct paper off and stick them together.
Then have the kids sew the wrapping ribbon through the holes, attaching the three pieces (foam, contact paper and foam) together. Tie a ribbon at the top two holes for hanging.
Have the kids add the words of your choice to the sparkle foam. My choice since this was an Easter craft, He Is Risen!
Life on a budget can leave you with no extra cash flow to buy a needed storage space for "stuff". A house where kids need to double up in bedrooms can cause space to become cramped. Parts of the country where you experience seasons and weather changes from day to day can lead to over loaded drawer space. Toys, toys, toys and no place to store them can leave you frustrated.
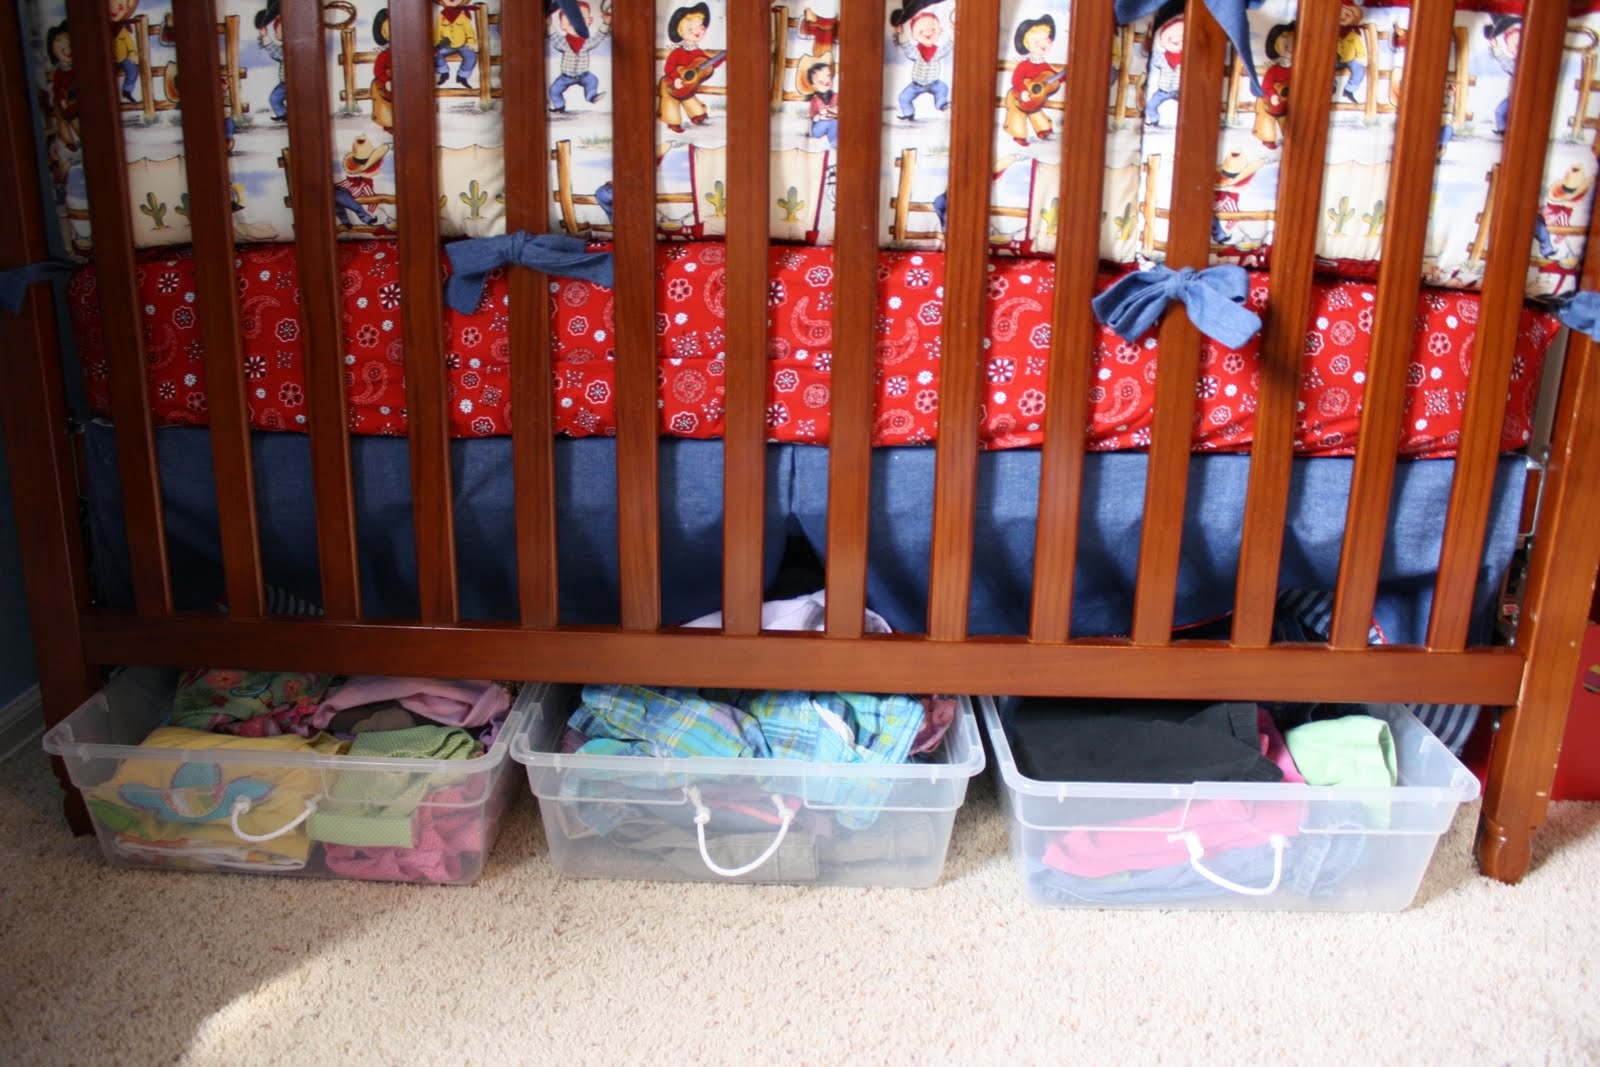
Why not put to use that unused under bed space to solve those problems and not break the bank at the same time? My simple solution to the dilemma I faced, turn plastic bins into drawers. My daughter is sharing a room with her (soon to be born) baby brother. I have scoured Craigslist for a dresser that could accommodate both of them while acting as a changing table at the same time. I just kept coming up empty. I currently own a changing table that I was plenty fine with getting rid of, but not to replace it with another changing table. That just seemed senseless to me. So being empty handed... for lack of one big dresser for both kids, I got creative. The changing table will serve the needs of baby and under bed drawers will serve the needs of my daughter.
Here is what I did.
First I measured the distance from the floor to the bottom of the bed. I then went to Target and found bins that would easily slide in and out from under the bed.
I then placed a piece of scotch tape on the bin where I wanted to drill holes to add a rope handle. I marked the spots for the drill holes with permanent marker.
I sized up my rope and chose a drill bit to match.
I then drilled the holes. Putting the drill in reverse once the hole is made makes exiting the plastic bin a breeze.
I threaded the rope through the first hole. Tied a knot on the inside of the bin and then tied a knot on the outside. I did this to help keep the rope from sliding back into the bin. I then threaded the rope through the other hole and tied a knot on the inside of the bin.
Hint: you can put scotch tape around the end of your rope to ease it through the hole.
An ordinary plastic bin has now "bin" transformed into a drawer.
Since my daughters bed is still being transformed into cute, I show her clothes under the crib. In actuality they are under her bed. The crib will also have drawers to house toys.
In our house of four kids I could spend my days filling and emptying my dishwasher of just cups alone. My solution has been one cup a day per kid. We have a space on our counter where I line up the kids cups in order of age. This works just fine, until we run into days when more than one child chose the same type of cup. Then begins the filling fast of the dishwasher again. One of my followers has a post on her blog (mightytwosave.blogspot.com) about clothespins being used to identify whose cup is whose. I thought this to be a wonderful and fun solution to our cup confusion.
One idea is to have your child decorate their own clothespin. What child would not have fun doing that! I decided however, to make them for my kids. They have used clothespins in many different crafts in the past. I did not feel they would miss out, but rather have fun with what I came up with.
You could simply do a solid color differing color for each child, or add the child's name, glue ribbon to the front, make a label cover it in contact paper and glue it to the front of the clothespin and so on. Have your kids color them with markers, paint them, put stickers on them, glue pom poms and turn them into caterpillars etc. Your imagination could go wild.
Please keep in mind I am not an artist, just a mom whose kids are blinded by my love. They do not see the amateur work, but rather the fun intended. Smile, smile!


 Just a little extra, makes for a more finished look.