Howdy! Here it is, my sweet daughter and darling baby boy's bedroom!
My amazing mom made all of the bedding! Bed skirt and all! She is so talented and she is my MOM! I am just in love with how it turned out!
I will be adding more pillows. As for a head board... well this works for now.
For the blank wall I have a few ideas or it just may remain bare. Still deciding on that one.
Horse Sheets just complete the look for my horse loving daughter! Notice the Ric Rac on the curtains? Love the added touch it brings to the room.
Welcome home pictures from my youngest daughters to their baby brother! So sweet!
My God fearing husband is the Senior Pastor of our church. After having our son, I was unable to attend church one Sunday morning. My older daughters went to church with daddy. As daddy was preaching my daughter drew this portrait of him. She said, "this is what you look like on the inside daddy!" She was so proud of how fun her daddy is! Now her picture is displayed on her very own memo board in her new room!
A boy girl room made with LOVE! You can check out my other posts about this room here.
A very simple addition to curtains really brings up the fun aspect! In this case adding a bit of Ric Rac to a pair of denim curtains brought about that bit of something extra I was looking for. As well as adding some red to help break up a whole lot of blue.
This is the part when I get to the how I did it. CAUTION... for any of you who are great sewers or posses amazing talents, this is not for you. Just scroll on down. Mom that includes you!!!
I thought about sewing on the Ric Rac and then I got wise! Do I want this very simple addition to turn into a two day project? So instead I got out my handy dandy hot glue gun.
Tuning my glue gun on low, I simply put my glue along the edge of the curtain and glued the Ric Rac right where I wanted it. SIMPLE!
Oh wait remember how simple this project was supposed to be? Well my little guy decided to add some extra effort to it by fussing at me. My solution stick him on the stroller next to me. Then each of my girls took a turn pushing him around (the only time I condone pushing in our family) to keep him content. For me this project took a bit of extra time, but for you minus the fussy baby it will be a matter of minutes!
Just a peak... here are the curtains hung in my daughter and baby boy's room. Soon the whole room will be revealed! Remember we are just waiting on my daughter's custom made bedding from my amazing mom!
A very simple addition really added some extra fun to the room!
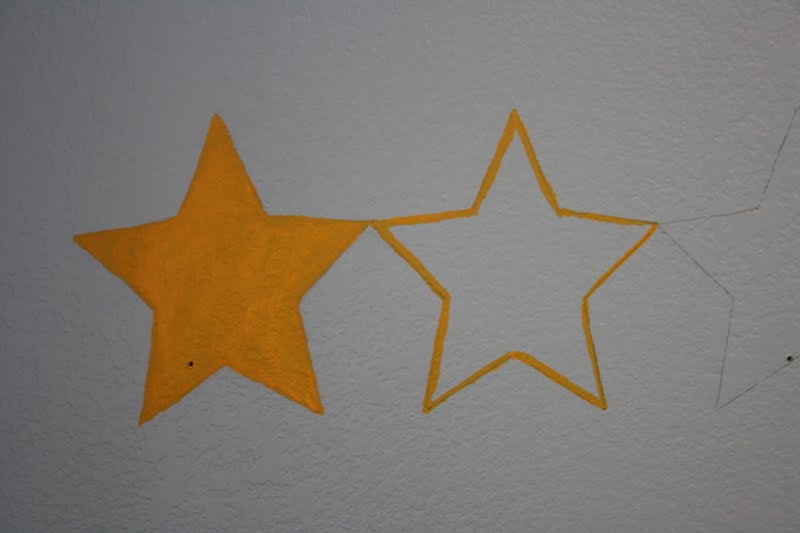
A wall so "blue" :( nothing on it to make it shine like a star.
Okay I know I am a goof ball. But I sure do entertain myself!
This is the wall above my son's crib. Plain and boring and needing this...
Do you see my sweet little guy in his crib? He was so excited to see the transformation of a boring blue wall adorned with stars sparkling forth his name. Okay he slept through the whole ordeal... thank goodness or I would have never finished this project.
In my previous post I shared with you how I used Mod Podge and Scrapbook paper to cover his wooden letters for his name. I decided to brighten things up (you laugh here) and add painted stars under the letters. This is a shining example of how a little paint can make a big difference.
Here is what I did...
I searched the internet for a star template I could print out. Printed it on card stock and cut it out.
I traced the stars on the wall using a pencil.
I had to use three coats of paint to get the star to really cover over the blue paint. Painting the star white first would have been a bright idea. I used Acrylic paint... same paint I use for my wood projects. Can be purchased at any craft store.
I give this project five stars!
I just love the way it turned out!
These are the picture hangers I attached to the back of each letter. I bought them at Lowe's for $1.94 for a package of six. On the letter "N" I used two so it would hang straight. These are so great, you just hammer them in, rather than hammering in a little nail to hold it in place.
And to think, I did all of this while still in my pajamas! Pin It Now!
Sunset.com Photo by Megan Thompson; courtesy of MyHomeIdeas.com
I am on the search for creative ideas for a twin headboard. May I also add inexpensive ideas for a twin headboard.
I am still in process of putting together my daughter and baby boy's room. One thing I am lacking is a bed frame or headboard for my daughter's bed. I thought it would be fun to be creative with coming up with a headboard for her instead of buying a whole bed frame. Later on in years when the two no longer are roomies, I may want this bedroom to have a full size bed and not spend the money on a temporary need for a twin bed now. My original thought has been to make an upholstered headboard, but we will see if my search yields any other creative solutions.
These photos are some of the things I have come across.
Sunset.com Photo by Deborah Whitlaw Llewellyn; courtesy of MyHomeIdeas.com
I love the rustic boards used as a headboard and what they did with the wall space. Also the frame bed, simply made from molding purchased at the hardware store and painted. I am thinking the middle of the frame can be either paint or fabric.
Some other ideas I came across were using shutters, or picket fence. Maybe even using shelves or cork board. There are a lot of really great ideas out there. Now I just have to decide what direction I want to go.
Here is a link to another really great sight for ideas. curbly.com Pin It Now!
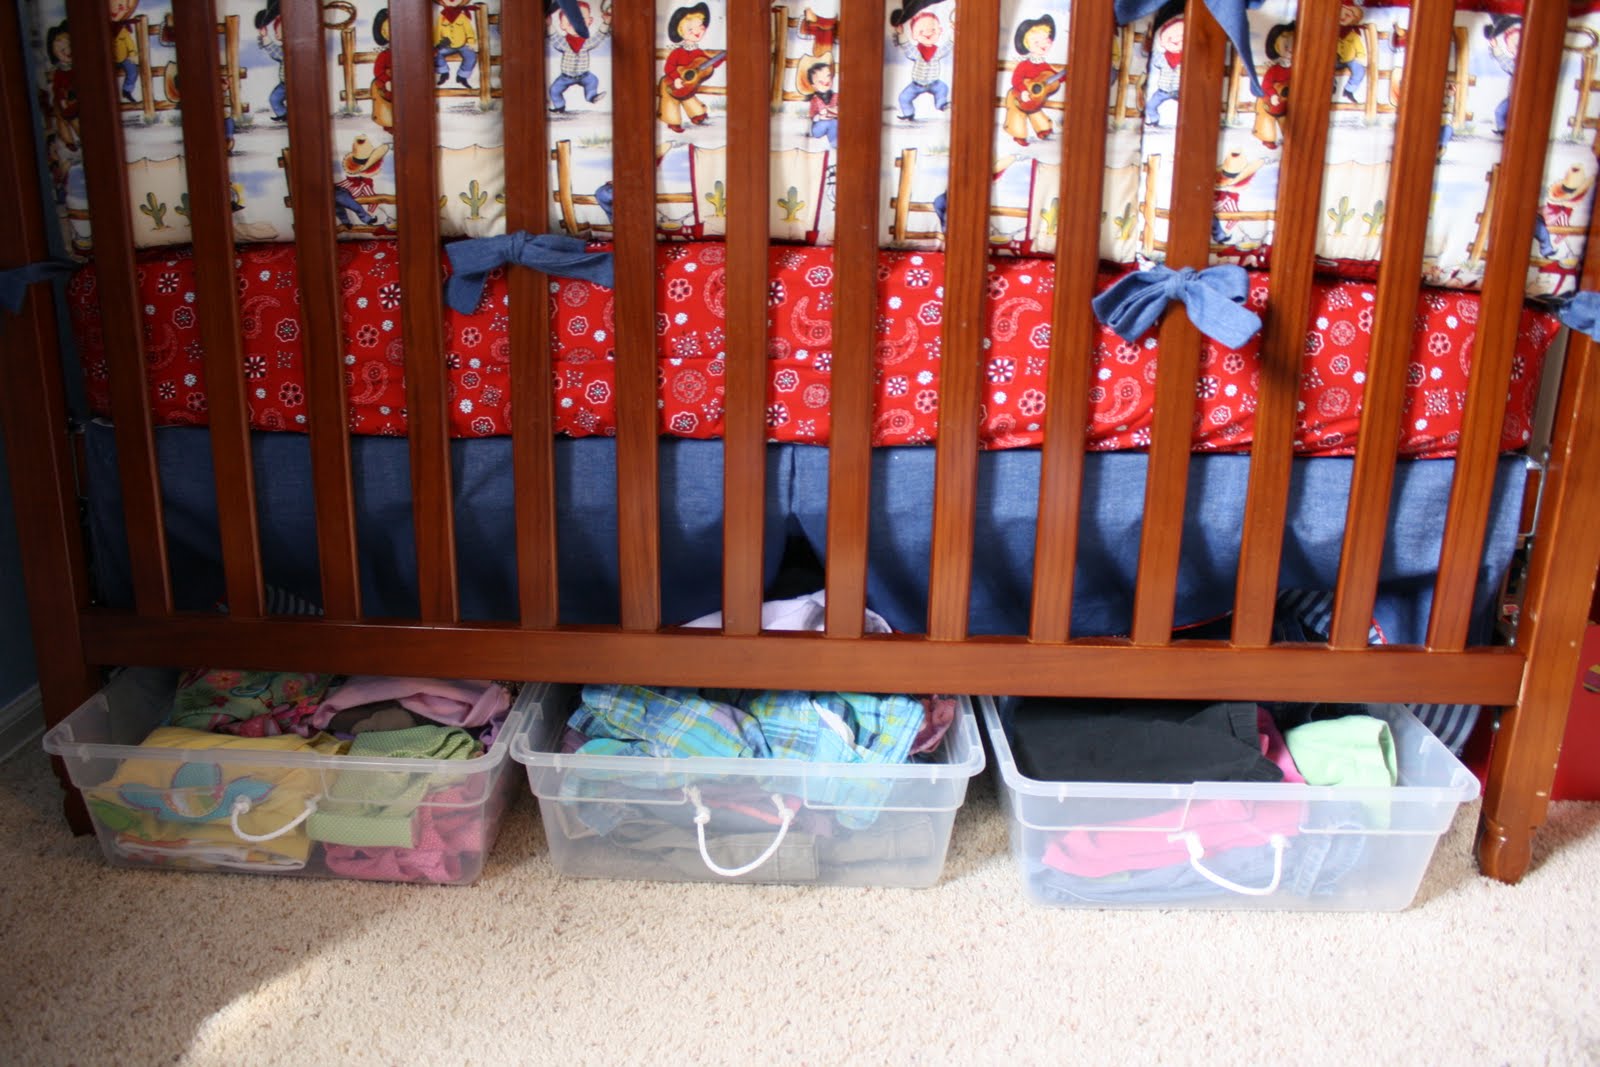
Life on a budget can leave you with no extra cash flow to buy a needed storage space for "stuff". A house where kids need to double up in bedrooms can cause space to become cramped. Parts of the country where you experience seasons and weather changes from day to day can lead to over loaded drawer space. Toys, toys, toys and no place to store them can leave you frustrated.
Why not put to use that unused under bed space to solve those problems and not break the bank at the same time? My simple solution to the dilemma I faced, turn plastic bins into drawers. My daughter is sharing a room with her (soon to be born) baby brother. I have scoured Craigslist for a dresser that could accommodate both of them while acting as a changing table at the same time. I just kept coming up empty. I currently own a changing table that I was plenty fine with getting rid of, but not to replace it with another changing table. That just seemed senseless to me. So being empty handed... for lack of one big dresser for both kids, I got creative. The changing table will serve the needs of baby and under bed drawers will serve the needs of my daughter.
Here is what I did.
First I measured the distance from the floor to the bottom of the bed. I then went to Target and found bins that would easily slide in and out from under the bed.
I then placed a piece of scotch tape on the bin where I wanted to drill holes to add a rope handle. I marked the spots for the drill holes with permanent marker.
I sized up my rope and chose a drill bit to match.
I then drilled the holes. Putting the drill in reverse once the hole is made makes exiting the plastic bin a breeze.
I threaded the rope through the first hole. Tied a knot on the inside of the bin and then tied a knot on the outside. I did this to help keep the rope from sliding back into the bin. I then threaded the rope through the other hole and tied a knot on the inside of the bin.
Hint: you can put scotch tape around the end of your rope to ease it through the hole.
An ordinary plastic bin has now "bin" transformed into a drawer.
Since my daughters bed is still being transformed into cute, I show her clothes under the crib. In actuality they are under her bed. The crib will also have drawers to house toys.