Showing posts with label Scrapbook Paper Art. Show all posts

Thursday, January 12, 2012

Photo Flip Books


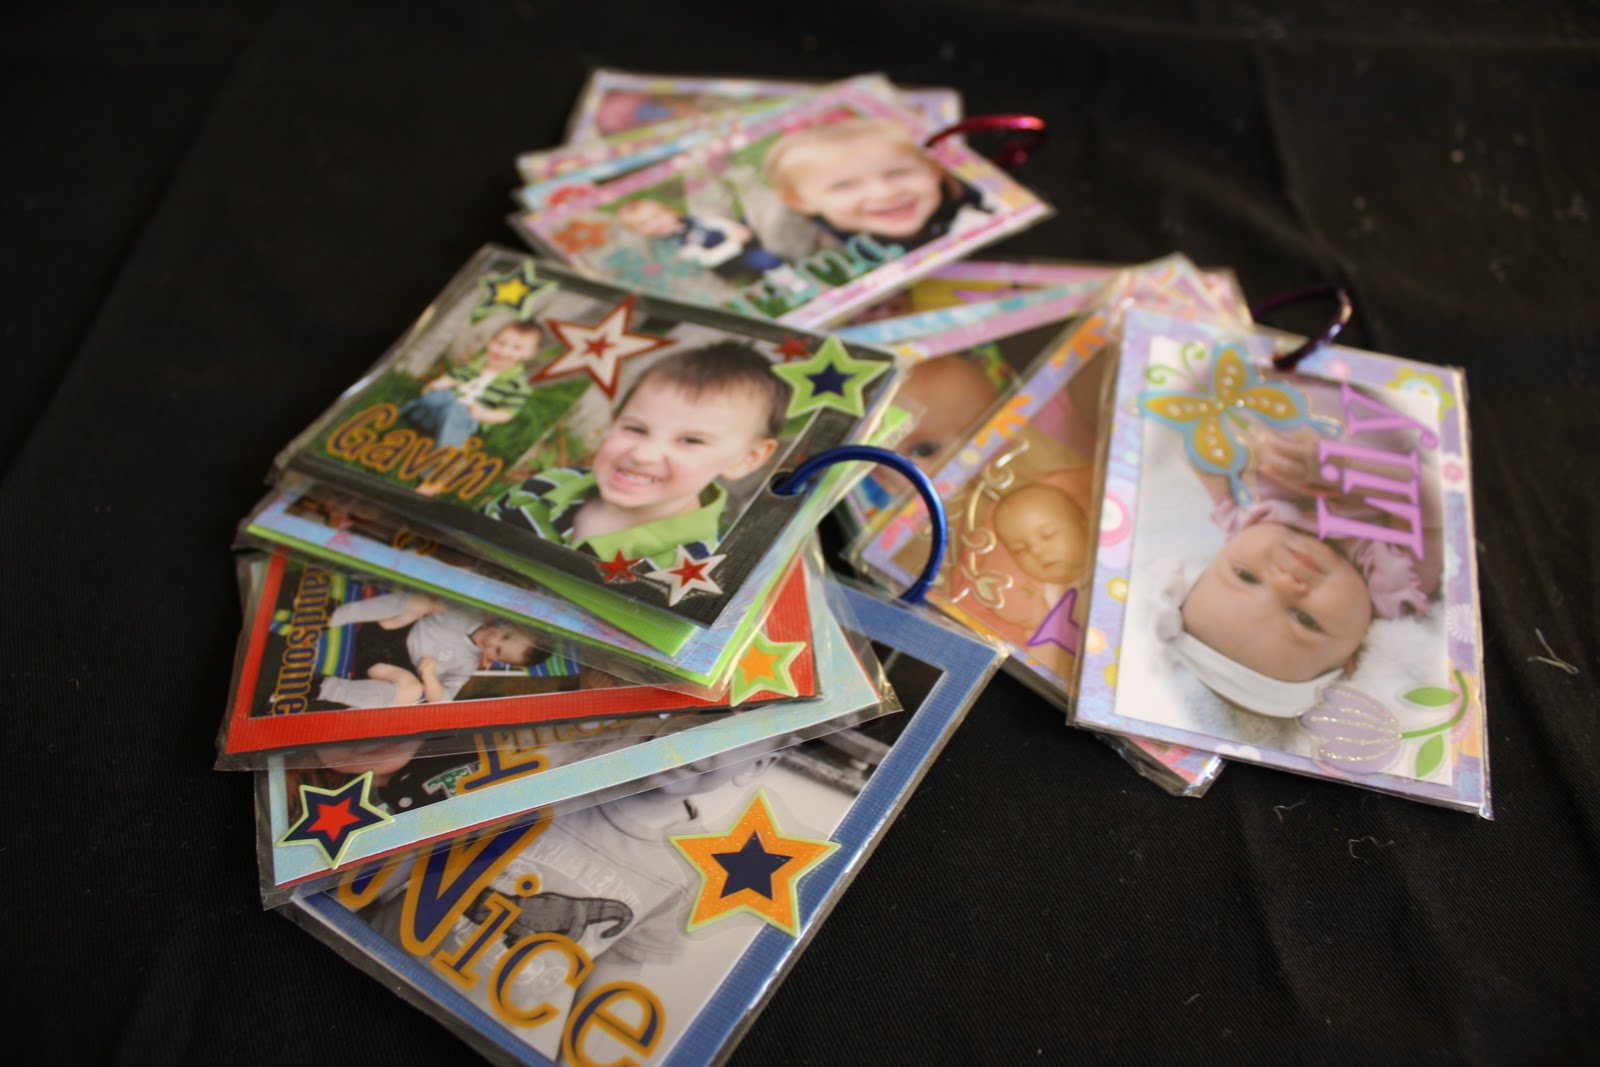
Kids and photo lovers will just flip over theses Photo Flip Books! Every child I have ever met all around the world, LOVES to look at pictures of themselves and people they love. These little books can either be something a child holds onto or is placed on a bag. How about Grandma? Maybe she needs a little Grandma brag book she can attach to her knitting bag or her gym bag because not all Grandmas knit. :) What a great gift for the mom who has a diaper bag! These little books make for a fun addition to a Library book bag as well. More ideas: Play purse, ballet bag, backpack, karate bag, sleep over bag, swim lesson bag and so on.


 How to create these fun Photo Flip Books:

Edit the photos of your choice.
I created my collages using Picasa 3. In collage settings you need to create a custom ratio for 2.5 x 3.5 (wallet size). Even if you are using a single picture, create it in collage so it can be set at wallet size. Add the text you desire. You can go with a theme or as I did, spell out the child's name in an acronym.
B- beautiful    E- energetic    T- thoughtful    H- happy    Beth
Have your photos printed. I used Costco wallet size prints.
Supplies needed:
Card stock scrapbook paper (one paper per photo)
Stickers (I used scrapbook stickers)
Scrapbook sticky tape tabs (to attach photo to card stock)
Glue stick
Hole punch
Book rings
Books will need to be laminated. You can pay to have them done at Staples. If you do then make sure to tell them NOT to cut too close to the card stock paper edge. You want a good seal.Or you can laminate them yourself.
 Attach each photo to it's own card stock. Then glue the two pieces of card stock together.
For these cards I chose to spell out the child's name front and back. On one side I have a cover page with the child's name. On the reverse or back side of that page is the last letter of the child's name. This is the case if you are spelling out the name two times. The other option is to spell out the name on the front and then on the back side add photos with fun or special sayings.

Again, just to be extra clear... on one side the name is spelled from cover page to last letter in the name. On the reverse is last letter of the name to the cover page. So that once the cards are on the ring both ends have a cover page. This is only if you choose to spell out the name twice.

The second way is to spell out the name on one side and on its reverse side, photos with the words of your choice.
Hint: If you want to make a photo book for someone, but you don't have photos of them, but you are Facebook friends you can thief the pictures. If using an Apple device such as iPhone, iPad or iTouch you can click on the photo and select save. If working from another device, click on the photo and select download.
For these three photo books I used some of the same photos for the reverse side of the name side. Two last helpful tips: Make sure all your photos are going the same direction, for the front photo as well as the back photo. You can see example of that in some of the above pictures.  That way you have one top for the hole. I punched the hole once the card was laminated.

If you make these fun Photo Flip Books I would love to see what you create! Send me an email thecreatedhome@gmail.com


Pin It Now!

Wednesday, June 8, 2011

Wooden Letters


Wooden craft letters crafted! There are so many things you can do to make over a wooden letter. In the past I have painted wooden letters by hand. See here  for my previous post. This time around I covered the letters in scrapbook paper. Here is what I did.
You can buy these letters at Hobby Lobby or any other craft store. I waited to buy mine at Hobby Lobby when they were 50% off.


First,  I  painted the letter using an acrylic paint. I choose a color that to coordinate with the main color of the scrapbook paper I was using. You could use white for every letter if you prefer. The part that matters most for the paint are the sides since that is the only part that will show.
I then placed my letter on the paper and traced around it. You could turn your paper over, turn you letter over and trace it that way if you prefer. Same result.


 Once your letter is cut out you are ready to glue it on using Mod Podge.
Mod Podge can be found at your craft store, I bought mine at Hobby Lobby.
  
You will use this to first paint your letter. Stick your
paper on your letter and then paint over it using nice even strokes with the Mod Podge. There are different finishes of Mod Podge, I choose to use the shiny kind.


You may have parts where the paper sticks out over the edge of the letter. Once dry, I used a bit of sandpaper to flatten the paper to the edge of the letter. Sand in one direction so you don't rip the paper.

For my letter A I used each paper used in my son''s name.
What I did...
Lay the paper you want on the part of the letter you want it. Trace around it and cut it out. At times you will need to hold the paper in place on the front, turn it over to trace on the back. Figure out what piece needs to be Mod Podged first.Once all the peices of your "puzzle" are in place paint the front with your Mod Podge.

To make it a bit more fun I added a horse charm for my horse loving daughter.


Pin It Now!

Tuesday, June 7, 2011

A "Word" on Homemade Art

Using the help of the internet and Word I made very inexpensive art work.
I painted frames I already had, used scrapbook paper, printed out the pictures I wanted and viola!


Again backed with scrapbook paper I made a collage.


I painted this frame red, black and blue... it came out rather well for the look I wanted. Considering it used to be an unattractive laminate brown frame.


Word! Don't you just love what you can create using Word? To personalize these prints I added to the one on the left, Cowgirl and my daughter's name. To the one on the right I added my son's name to the top and bottom. To think I could have bought these prints on canvas for over a hundred dollars each! I am quite content with my print out version.


A thrift store frame that used to be natural wood... brown. Getting the idea... yup another print out backed with scrapbook paper.


What used to be an ugly green frame got a coat of black paint and topped with a coordinating ribbon. I love my hot glue gun!


Here is before adding some additional art work.


After. For being on a budget it came out fun!


My horse loving cowgirl is very pleased so that is all that matters! I did not need to spend hundreds of dollars on art work to make her smile and feel loved!

Pin It Now!