Showing posts with label Repurposing. Show all posts

Wednesday, August 29, 2012

Lampshade Makeover

What do an iron and a lampshade have in common? One very wonderful makeover project!
I bought this lampshade on clearance at Target with the purpose of giving it a makeover. Though it is cute, it is just not quite cute with the decor of my home so it needed a change. Using my iron, I set it on full steam and steamed around the shade. The steam and heat loosen and lift the glue making it possible to separate the fabric from the pieces needing to be reused.
 Here is the first part of the metal frame. In this particular shade there is a bottom frame as well rather than being all in one piece.

 Now that the shade is separated from the frame, it is time to separate the fabric from the shade.
 Using the steam once again iron over your fabric. Begin to lift the fabric from the shade.
Once you have separated the two, you now have a shade ready to be recovered. Lay out your shade face down on top of your fabric to use as a pattern. Cut around your shade leaving enough (but not too much) fabric to be wrapped around the edges of the frame. 
Then with spray adhesive or fabric glue brush on the glue on the wrong side or your fabric. Once your fabric is in place, use your hot glue gun to glue the top part of your frame in place. Once that is done it is now time to glue your bottom frame. After your frame is in place you will need to glue the edges of your frame. Go around the frame with your hot glue gun and wrap the fabric around the frame. 
Now time to "fun" it up with fringe! Don't let that glue gun cool because you will need it yet again to give your new lamp shade some sassy style. Remember the adorable play kitchen remodel? This stylish lamp coordinates with the bottom part of the ruffle. Oh the ear piercing squeals my girls let out, yes they love their new set up as much as I do.
 P.S. The lamp base was a garage sale find that used to be green. It got a fresh coat of black paint along with a new "hat" and I have to say this very inexpensive makeover turned out swell.


Pin It Now!

Monday, August 27, 2012

Play Kitchen Remodel

When my oldest daughter was two she received a wooden play kitchen for Christmas from her grandparents. She was so little she could barely see over the top of the kitchen. Eight years and four more kids later this wooden play kitchen is sill played with and well loved. So well loved that the paint on the burners was chipped and needed refreshing. Why stop there I thought? Why not do a kitchen remodel? That is exactly what I did and boy am I glad I took the time. The adorable factor was kicked way up! It is amazing what a little paint and fabric can do. Now many more fantastic "meals" can be created by my five darling little chefs!


For the knobs I added scrapbook stickers and then sprayed them with Mod Podge sealer.

 I simply hot glued the ruffle onto the kitchen door. I also used my nifty hot glue gun to add the embellishments.  I just love an upgraded kitchen don't you? Simply adorable and perfectly simple to do.


Pin It Now!

Sunday, March 4, 2012

Hoopla Jars

 Allow me to define what is contained in this little jar of fun...
Hoopla: excitement; bustling excitement or activity; commotion; hullabaloo; to-do. 
Synonyms: action, activity, bustle, buzz, stir, thrill, elation...
What is all the hoopla about you ask? In each jar there is a scroll. On each scroll there is a surprise. Each surprise is bustling with excitement... hoopla in a jar!  
Family night is a regular occurrence in our home. To add to the fun and memory making aspect of it all I came up with Hoopla Jars. On each scroll, in each jar contains a different thing to do as a family. From Hide and Seek to going out for ice cream, indoor family camp out, game night, movie night or even family craft night, in each jar there is sure to be hoopla... excitement. For my scrolls I came up with poems or riddles that lead up to the fun activity spelled out at the end of the scroll.
You can simply roll your scrolls, but I found using a wooden dowel (1/4") made it a lot faster and easier. 
 Here is an example of how I wrote out the fun activity in rhyme.
 Binder clips hold the scroll in place...
So a ribbon may be easily tied to hold it closed.
I used baby food jars and just spray painted the lids. Even if you don't have a baby, to buy several jars it will only be a few dollars. The numbers are scrapbook stickers.
We are taking turns choosing a jar. My girls get to choose the number jar they want to open. For us family night is on  Thursday nights, so needless to say the anticipation of opening a Hoopla Jar lasts all week! You could also roll dice to see which jar you will open or just open them in numerical order. After all the jars have been opened, mix up the scrolls and replace them in the jars or take family suggestions for new fun ideas. Hoopla Jars most definitely will be full of lasting memories!


Pin It Now!

Thursday, July 7, 2011

Built In Desk Makeover

I have a built in desk in my family room right off the kitchen. It has been a source of frustration for me for awhile now. It seems to not only be a bit of an eyesore but a clutter catcher as well. Since ripping it out was not an option I had to get creative. What could I do that would take away my extreme dislike for this area is what I began to ask myself. Well... here is what I came up with for now. I do have to say the dislike has disappeared! Amazing what a little paint and some creative touches can do to transform frustration into a feeling of satisfaction.


One of the things I really did not like was the open cubbies. My sweet husband uses this desk as well. Though I don't think he has ever sat at it, he does "store" stuff here. So I knew the cubbies were one area I needed to tackle. The paint color matches the accent wall in my family room as well as the bit of green I have in the kitchen. The cubby curtain matches my kitchen window valance that you can see here, as well as pillows I made for my couch. The top wall above the cabinets I am still deciding if and what I will do up there. 

The memo board... can you keep a secret? It is a plastic bin lid that I turned into a memo board. Remember the plastic bins I made into drawers in my daughter's room? You can see them here. Well the lids were just sitting with out purpose. Purposeless no longer! The fabric matches pillows I made for my family room couch.


For the letter bin I used Word once again to create what I wanted inside the frames.


The toile back ground in the above picture was copied from a wall paper sample I found on the Internet. I just Googled toile and found different options. I then pasted it into Word and added the text I wanted.
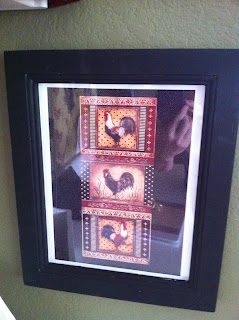
For the roosters I also used the Internet and Word. I found the rooster prints I liked, copied them and pasted them. Each rooster is an individual print that I just stacked one on top of the other. The background I used for the roosters is the same one I used for my letter bin.
The frames for the pictures also found themselves made over with paint. gotta love black paint!


For the curtain here is what I did. I measured the fabric to the size I would need. I then pinned the edges and sewed them. To create the ruffle, as I was sewing the top I folded the fabric, reversing the fold each time. For example if I folded to the left the next one I folded to the right and so on. I used a zig zag stitch with silver thread. To attach the curtain I used double stick Velcro.


The folder cover is a background you can choose for a blog. I copied and pasted it into word and then added the words I wanted. The folder is a great solution for me and all my random ideas I come up with. It helps me keep my thoughts of what I would like to do around my home organized. I have each room or area in my house broken down and divided with dividers. Each section has a plastic insert where I can slide magazine clippings in of things that inspire me.


So there we have it! Simple touches that have taken my frustration away! Total cost for me to transform this desk area... my time and that is all.
May I encourage you, if you have an area around your house causing you frustration. Look around and see what you could do to improve upon it with what you already have. 


Pin It Now!
Tuesday, June 7, 2011

A "Word" on Homemade Art

Using the help of the internet and Word I made very inexpensive art work.
I painted frames I already had, used scrapbook paper, printed out the pictures I wanted and viola!


Again backed with scrapbook paper I made a collage.


I painted this frame red, black and blue... it came out rather well for the look I wanted. Considering it used to be an unattractive laminate brown frame.


Word! Don't you just love what you can create using Word? To personalize these prints I added to the one on the left, Cowgirl and my daughter's name. To the one on the right I added my son's name to the top and bottom. To think I could have bought these prints on canvas for over a hundred dollars each! I am quite content with my print out version.


A thrift store frame that used to be natural wood... brown. Getting the idea... yup another print out backed with scrapbook paper.


What used to be an ugly green frame got a coat of black paint and topped with a coordinating ribbon. I love my hot glue gun!


Here is before adding some additional art work.


After. For being on a budget it came out fun!


My horse loving cowgirl is very pleased so that is all that matters! I did not need to spend hundreds of dollars on art work to make her smile and feel loved!

Pin It Now!

Sunday, June 5, 2011

Memo Boards

Online I found a memo board that would match my Vintage Western boy/girl room/nursery for $100! That was $91 more than what I ended up paying by making my own.
 I found two magnetic cork boards on clearance at Hobby Lobby for $2.00 each. Magnetic so cool, since this is going in a child's room I don't want push pins.   
 I cut my fabric so it would wrap around the board leaving enough to hot glue on the back. I used straight pins to hold the fabric in place at each corner.

I used a hot glue gun to attach the fabric to the board. I then chose to use a see through ribbon so it would not distract from my patterned fabric. I again used straight pins to hold the ribbon in the place I wanted it. Using my hot glue gun, I glued the ribbon at the back of the board.

 I chose to do two Xs with my ribbon (a total of four cut ribbons) but you could use six ribbons to make more Xs.
 I then choose two buttons from my button jar. I keep this jar in my laundry room to catch any lost or extra buttons. (Click here to see my laundry room makeover)
I sewed them on using strong thread since little hands will be pulling at the ribbons to add their art work or pictures.


I stitched the button thread to the fabric so I could tie it off. I pulled it tight to keep the button firmly in place. 

I made two memo boards. One using my son's fabric and one using my daughter's fabric. 
Again I used a see through sheer ribbon so the pattern was not hidden.


I just love these fabrics for my boy/girl bedroom. The memo boards turned out super cute for only spending $9.00!


Here is the pillow sham for my daughter's bed. I am so excited! My mom is custom making all her bedding! As soon as the bedding is complete I will do a full room reveal.
Click here for my previous posts for this room.


Pin It Now!