Tuesday, October 23, 2012

Personalized Bath Towels

Five kids sharing one bathroom means, desperate need for organization! I had been using a color towel system (see here) that was working great, but I wanted something a little more personal and fun. Here is what I came up with. I am just loving how the towels turned out. I also love that my kids are enjoying hanging up their own towels and no one is left guessing whose towel is whose.

 Here is a quick tutorial of what I did. If you are left with questions, please message me, or email me and I will do my best to clarify.
The first thing you want to do is locate your tag. It will need to be on the bottom and the back. Lay your towel down and measure the top part of your towel. My towels had a clear band of stitching, at the top. Just above that, I measured the width and length. I then measured that same width and length for my fabric adding extra for a 1/4inch seam all the way around.
Notice just bellow my fabric is the stitching on the towel. I wanted to place my fabric directly above the stitching.
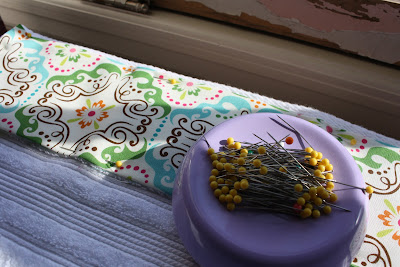
I first pinned and ironed my seam. I did a 1/4inch seam all the way around my fabric. Then I pinned my fabric to my towel.
 Using a straight stitch, I sewed the fabric onto the towel.
Now time for the monogram! I used my word processor to print out the font I wanted for my monogram. It is best to use a bold font.
I used liquid stitch to hold the fabric monogram in place on the towel. I then used an applique stitch on my sewing machine and sewed the monogram onto the towel.
I chose to place my monogram at the opposite, top corner of my towel. That way when the towel wraps around the monogram shows. 


 Because towels need to hang up to dry, I decided they NEEDED an easy hang loop! Here is a quick how I did it picture. 
The loop once pinned on (to the backside of the towel) should measure about 4". I folded my towel in half to find the exact center and pinned it on there. Using a straight stitch I sewed back and forth a few times just to reinforce the loop, since it will be holding the weight of the towel.
Are they not just lovely? It really is a simple project for a great result! Hope you have fun personalizing your towels!


Pin It Now!

Tuesday, October 9, 2012

Now Open!

I am thrilled to announce the start of a new adventure for me! The launch of my new shop Creatively InDePendant in the wonderful market place of etsy! Please come stop by, shop, browse, tell your friends! I would be honored to have you join me!
Just follow the link placed inside Creatively InDePendant and you will land inside my shop! Or click on the "Shop" tab at the top of my blog and that will also guide you right to Creatively InDePendant! While in etsy if you did not follow one of my links, I can be found under the search tool by typing CreativeIndependant.

Come follow me on Facebook! CreativelyInDePendant on FB

Look forward to seeing you!
Pin It Now!

Wednesday, October 3, 2012

Contact Paper Labels


I love labels! I love all those great vinyl labels available today, but the price just soars out of my budget.  Sadly I am not among the fortunate to own a Silhouette vinyl adhesive cutter do-hickey machine.  However, fortunately for me, my creative, frugal juices started flowing and I came up with my own solution for making "vinyl" labels.
Here is a quick tutorial of what I came up with. The labels I used, I created using gimp but the Internet (Pinterest too) is FULL of free printables you could take advantage of. 
I also used this method on other labels that I found out there on Pinterest while searching free printables. I cut these labels up and applied them to gift bags. Makes for a fun personalized way to say, "You are special to me!"
If you don't already, follow me on Pinterest and you can find these labels on my Printables board.
Hope you have fun sticking Contact Paper labels all over your home like I have.


Pin It Now!