Thursday, May 9, 2013

Easy and Cute Summer Bags

A trip to Target seems to be on most of our weekly or every other week To Do Lists these days. It sure is true for me. The first thing I do when I arrive at Target (unless they have a Starbucks on site) is hit the Dollar section. Sometimes I walk away with things I just couldn't live with out and others not so much. My most recent trip was defiantly a score big time! I found these plain and ordinary straw bags that were just screaming to be rescued and made cute. What kind of person would I be to just ignore their pleas?
I snatched up four bags for my girls and am in process today of turning boring into beautiful!
There are so many directions to go in, from flowers to stenciling an initial to just simply adding ribbon. My first bag is on the simple but stinking cute side of all the possibilities.
All I did was have child #1 chose her ribbons. I turned over the ends 2 times and sewed them down so they dint fray. Then I pinned my ribbons to the bag and with a zig zag stitch, sewed them onto the bag. It was that quick and easy for a really fun result!
So hurry over to Target before I go back for more! ;)
Enjoy!


Pin It Now!

Friday, April 12, 2013

Art Display

Catering to my children's creativity is very important to me. Displaying their creativity is of equal value. So I knew that in our new basement playroom and craft room an art display was a must.
To keep within the theme of my craft and sewing room I thought the perfect way to make an art display was by using wooden thread spools.
I headed down to Hobby Lobby and found a bag of wooden thread spools just the size I desired as well as the Jute twine and clothespins.
I simply tied the twine onto the wooden spool and then wrapped it around. I cut the twine long enough to repeat the process on the other side. Then using large nails I hammered them through the hole of the spool. You could use screws and wall anchors to ensure the strength of your art display if you prefer.
Once your art display is complete it's time for your little or big artists to show off their masterpieces! It was really that simple and I just love the way it turned out!
I may just leave this art display in its natural form or may paint the clothespins. I haven't decided since I do love it just the way it is. Either way would be fun!


Pin It Now!

Thursday, March 21, 2013

Construction Journey Part 3

Raise your hand if you can relate... Not everything you plan works out exactly the way you plan it to. This is very true in my life and it brings to mind the scripture, "The plans of the heart belong to man but the final reply comes from The Lord."
We left our sunny vacation spot on Wed. to start the two day drive back home. The first day of our drive went like a dream. We just couldn't believe how smooth everything went, especially when traveling with five young kids! When we reached our target city and checked into our hotel for the night my oldest daughter and I did a happy dance! We actually were going to make it home just after our kitchen countertops would be installed and in perfect time to watch the backsplash installation. Then came the text from our contractor informing me of the "less than ideal" situation he encountered with our granite slabs. Don't worry he told me, he and his crew were working round the clock to make sure all was perfect. However... However is always the clue word for, there is a change in what you had planned ... However the countertops will not be going in on the next day as planed. Yes there they were... Those words, "Not as planned." At first we were disappointed. My first thought was, "Oh man! I have waited so long and I really thought I would be walking in the door from vacation to a new kitchen." Then it hit me! Disappointment disappeared as excitement rose up in my heart when I realized, this may not be what was planned but it is what I had hoped for. I had hoped I could be home to witness the installation of my kitchen. Now I would be home! Yay! The plan was now set, we would make it back home in time for our kitchen transformation.
Begin day two of our road trip and those clear skies we had on day one, would not be present the whole drive through. We were informed of the possibility of having to stop for the night. Hey wait a second that isn't the plan. We had planned to make it home today. To be home in time for installation. Plan changed once again. Well the weather did pick up and due to snowy conditions the freeway was closed and we were left with no choice but had to spend another night in a hotel. This bringing me back to missing out on countertop install.
With in all these unplanned moments are treasures I never could have planned. Lots of laughs were had. After a quick check into the last available hotel we headed to a pizzeria for an early dinner. I punched in the address into the GPS and began to follow "the nice lady's" instructions. Round and round we went yet never arriving at our destination. Frustration was beginning to set in, then my five year old pipes up from the back seat, "Mom! I don't know if you realize but we keep going in circles!" My mom and I broke out laughing! We gave up on the GPS and went to a different pizza place that we had circled around all those many times around. Turned out it was better than what we had originally planned! Another funny situation and now treasured moment we have is, as it was snowing like crazy, the only shoes I had accessible for my girls were flip flops. Slushing around the parking lot was not my plan but for the short distance we had to walk, the girls had a blast. My oldest daughter teased me saying, "Mom people are going to think your a terrible mom putting your kids in flip flops in this weather!" Another burst of laughter in our series of "Not what I had planned" moments!
So here I am in my unplanned, unexpected second hotel for what is now a three, maybe more, day road trip home.
As for our kitchen, I will miss the counter install but the "plan" is I will be home for the install of the backsplash.
Our carpet was installed in the basement today, earlier than planned. Here are the pictures my sweet husband (who flew home from our vacation) sent me.
Let me just add, I am glad I don't have the final say on all of my plans. They usually turn out better than I could have ever planned!


Pin It Now!

Tuesday, March 19, 2013

Construction Journey Part 2

In my previous post I told you how much I have been enjoying our construction journey. It truly has been a blast!
Here are several pictures that will speed you through to where our house was 2 weeks ago when we left for vacation. The morning we were getting ready to head out for our trip, I received a text from my contractor (he was in my basement and I was upstairs still getting ready) letting me know in 30 min. demo on our kitchen would begin. Yikes! Exciting, except no one had eaten breakfast. Let me just say, it was an interesting way to head out the door for a two week vacation. I was without a sink and had a close to demolished kitchen.
Vacation has been great fun however I have been anxious to return home to our construction zone. I can not wait to see up close the transformations that have taken place while we have been away. We hit the road tomorrow and begin our two day trip back home.
Hope you enjoy the sped up version of our construction journey.


Pin It Now!

Sunday, March 17, 2013

Construction Journey Part 1

When we purchased our home we planned to build out our basement, put in a patio, update light fixtures and at some point redo our kitchen. Well life happened and time went by bringing us to four years later and finally construction is under way.
It has been a thrilling process and I couldn't be more pleased with our careful selection in choosing our contractor! I have had to make many decisions along this construction journey but the most important one has been the WHO were we going to trust into our home. Having any work done on or in the house while children are present is a decision not to take lightly when trusting access into your home. Especially for a job that requires weeks or months of work as our's has.
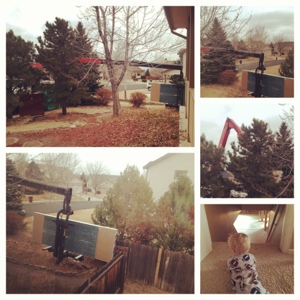
My kiddos have loved watching each truck deliver their goods, from lumber to dumpster to Port-A-Potty. I confess so have I... I have loved every step on this construction journey. Even the early morning wake up calls to the pound, pound, pound of a hammer or the late night spraying on of drywall texture, yes I have loved it all!
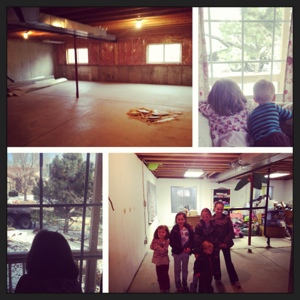
Here is a look at where we started from in our basement.


Pin It Now!

Friday, January 11, 2013

Personalized Mugs

Easy and fun are mugs with your own personal spin! With a Sharpie permanent marker an inexpensive mug, or even a plate, some creativity and an oven your project is done in 35 minutes.
Once your mug is designed to your liking (any mistakes can be removed with acetone nail polish remover) then place it on a cookie sheet and pop it in the oven. Bake at 350 degrees for 30 minutes and your design is now a permanent part of your mug.
These make for great gifts. Have your kids decorate their own hot coco mug or a special something for dad or grandparents.
Anyone will love sipping their favorite hot drink in a mug made special for them!
Happy decorating!

Pin It Now!

Tuesday, October 23, 2012

Personalized Bath Towels

Five kids sharing one bathroom means, desperate need for organization! I had been using a color towel system (see here) that was working great, but I wanted something a little more personal and fun. Here is what I came up with. I am just loving how the towels turned out. I also love that my kids are enjoying hanging up their own towels and no one is left guessing whose towel is whose.

 Here is a quick tutorial of what I did. If you are left with questions, please message me, or email me and I will do my best to clarify.
The first thing you want to do is locate your tag. It will need to be on the bottom and the back. Lay your towel down and measure the top part of your towel. My towels had a clear band of stitching, at the top. Just above that, I measured the width and length. I then measured that same width and length for my fabric adding extra for a 1/4inch seam all the way around.
Notice just bellow my fabric is the stitching on the towel. I wanted to place my fabric directly above the stitching.
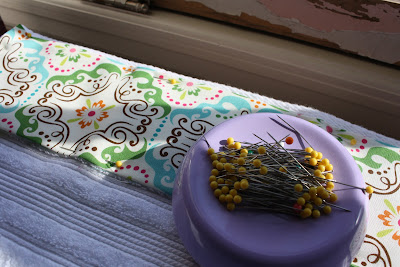
I first pinned and ironed my seam. I did a 1/4inch seam all the way around my fabric. Then I pinned my fabric to my towel.
 Using a straight stitch, I sewed the fabric onto the towel.
Now time for the monogram! I used my word processor to print out the font I wanted for my monogram. It is best to use a bold font.
I used liquid stitch to hold the fabric monogram in place on the towel. I then used an applique stitch on my sewing machine and sewed the monogram onto the towel.
I chose to place my monogram at the opposite, top corner of my towel. That way when the towel wraps around the monogram shows. 


 Because towels need to hang up to dry, I decided they NEEDED an easy hang loop! Here is a quick how I did it picture. 
The loop once pinned on (to the backside of the towel) should measure about 4". I folded my towel in half to find the exact center and pinned it on there. Using a straight stitch I sewed back and forth a few times just to reinforce the loop, since it will be holding the weight of the towel.
Are they not just lovely? It really is a simple project for a great result! Hope you have fun personalizing your towels!


Pin It Now!